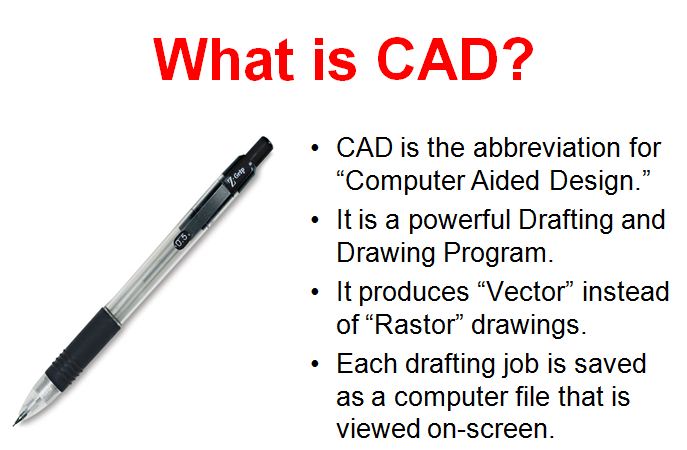
Scale Drawing Rc Plane Cad
1 of the all-time tools I ever discovered while being involved in RC scale modeling, is Estimator Aided Blueprint (CAD) programs. Information technology opened an entirely new segment of modeling to me, while also greatly increasing the precision in which I designed and adult scratch build scale airplanes. I have been using CAD programs now for more xx years and this mail is an online version of my presentation for drawing 3-views and developing plans to build RC airplanes.
Today, there are several free downloadable CAD programs and several trial apply CAD programs. You don't have to spend a lot of money to come across if you like information technology.
Allow'southward get started:

Be careful! CAD can become an entirely new hobby in itself!
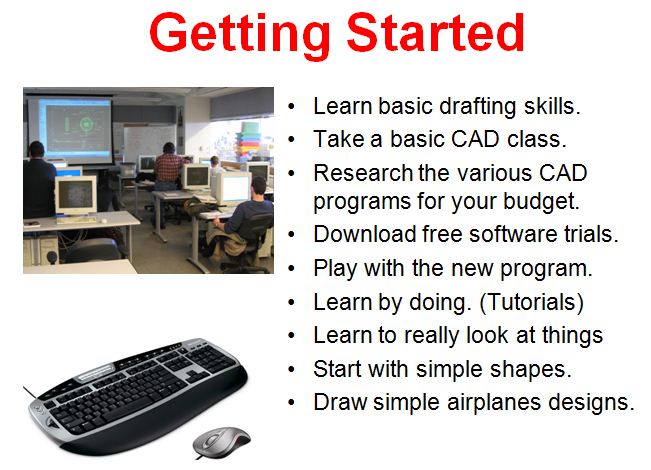
There are several reasonably priced CAD programs intended specifically for modelers looking to start playing with the design and drawing program. Also, there are "Low-cal" programs you tin download from the spider web to become started.
![]()
I accept been using Ashlar'southward Graphite CAD program ever since it was first introduced. The program is in my opinion, the easiest and quickest CAD program to acquire. I accept designed many RC airplanes using Graphite and I am now using version 9.
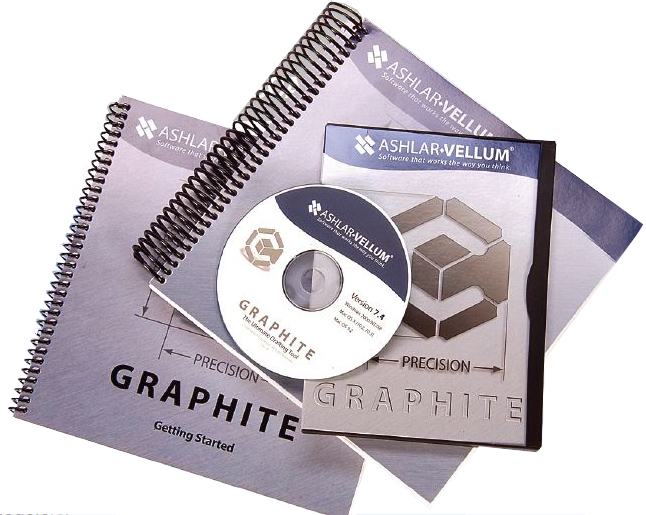
Graphite is now available as a "Deject" download program which you can pay for monthly from: http://ashlar.com/2d-3d-drafting/2d-3d-cad-graphite.html.
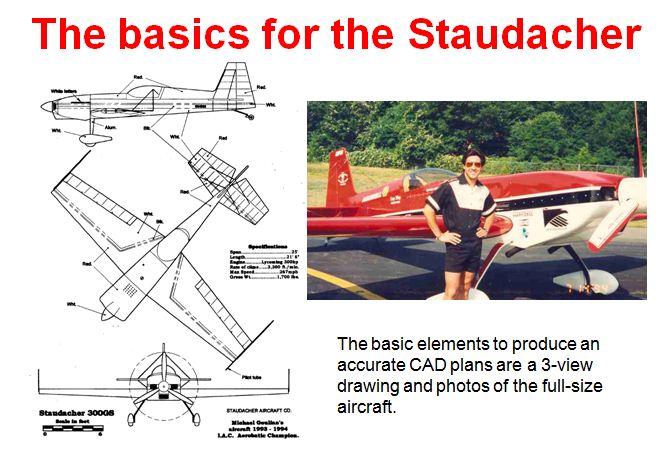
This CAD Kaos was the commencement design that I traced into CAD. I then simplifed and added modern hardware to the design. It turned out to be a not bad flying airplane just like the original Kaos threescore.

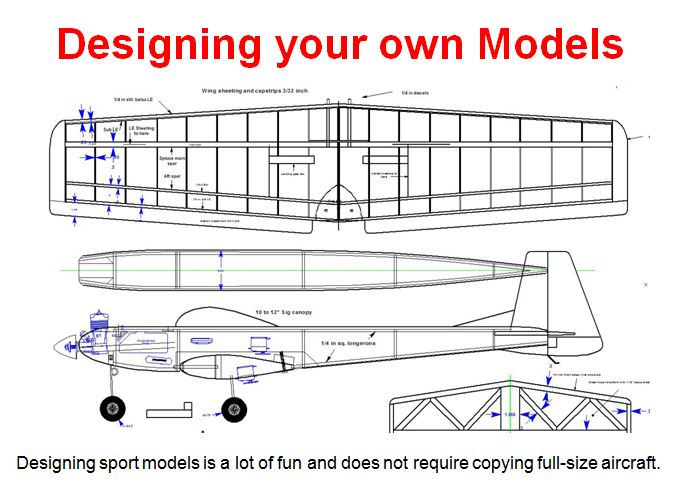
When information technology comes to scale airplanes, CAD allows you to duplicate whatsoever airplane there is. Just start with simple designs and work your fashion up to more than complicated ones.

Depending on the program you employ, you tin can import, Bitmap, Tiff, JPG or other type of paradigm file.
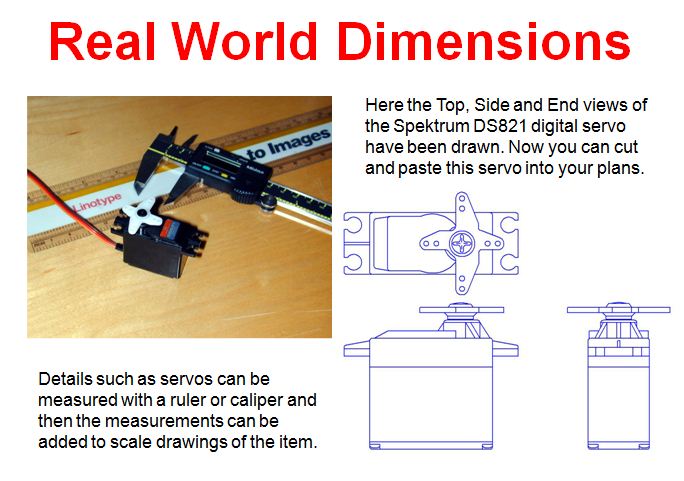
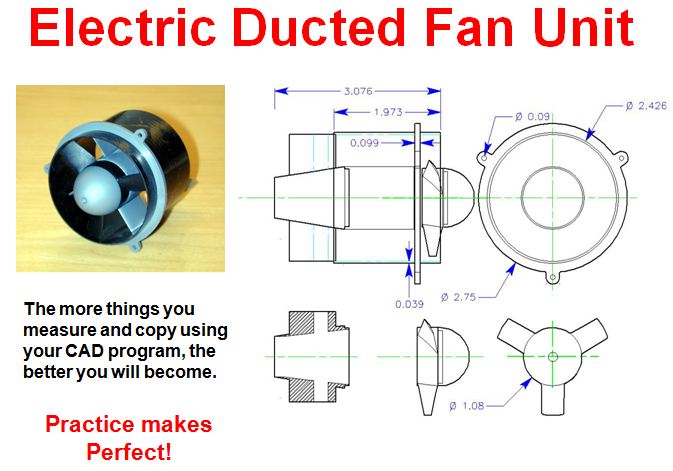
The other way to produce drawings, is to take direct measurements of the things you desire to draw.

For the evolution of plans where yous trace an existing aeroplane drawing, there are some rules I made that brand the job a lot easier.
Learning what your program has to offer is also a first step to using it efficently.
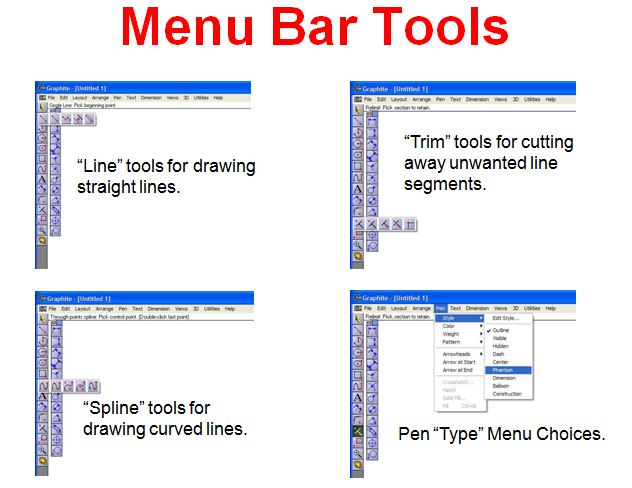
The tools are found in the on-screen tool bar and the pull-down menu windows.
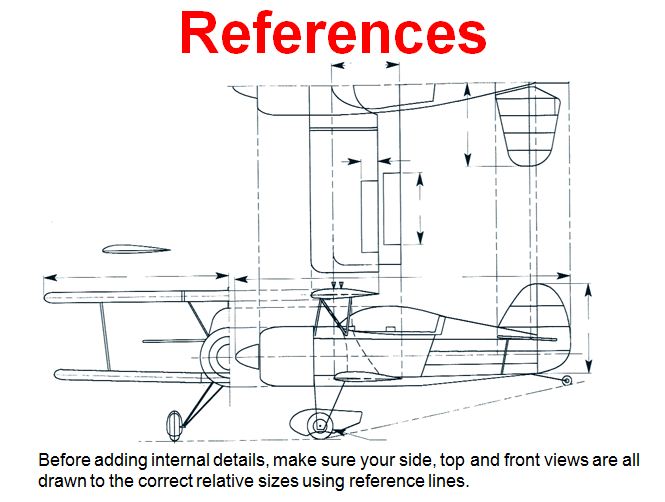
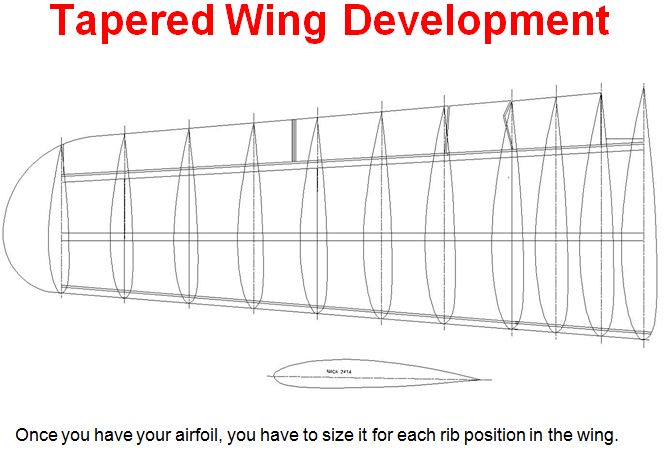
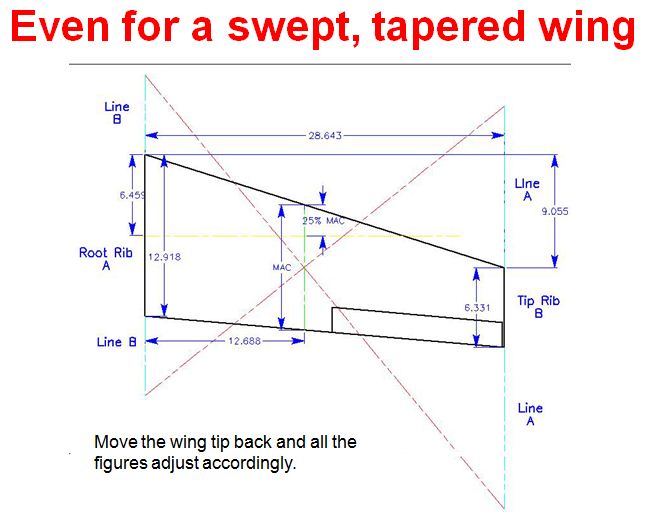
Afterward developing your front, side and top views of your model, you have to make certain they are all to scale with each other. This is important before you first developing the plans' details and add together the spars, formers, ribs etc.

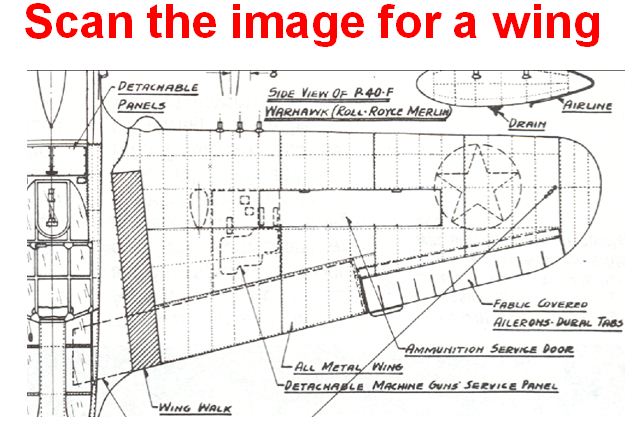
This is a department of a Wylam drawing of a P-40 Warhawk that I scanned and imported into my program. See below to see the steps in developing the model's wing.

Instead of using a freehand "spline Line tool" try to utilise the tool bar tools to develop the various shapes of the wing's outline and basic details.
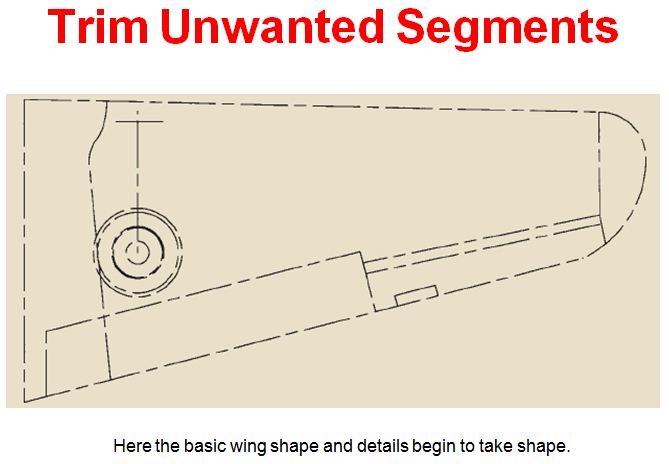
Starting to await like something!
At present make a mirror paradigm, flip it around and add information technology to this one and yous have a complete wing plan.
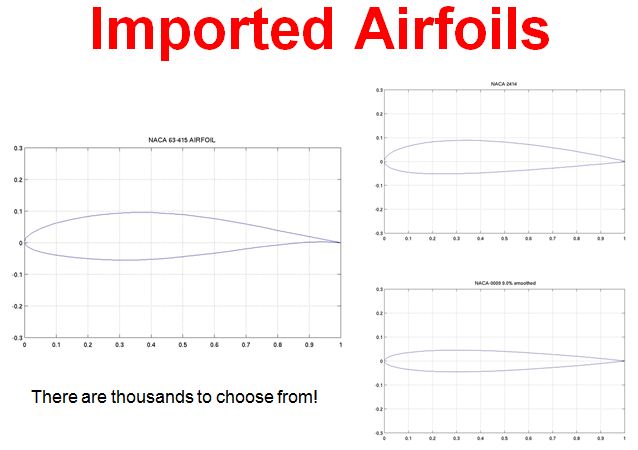
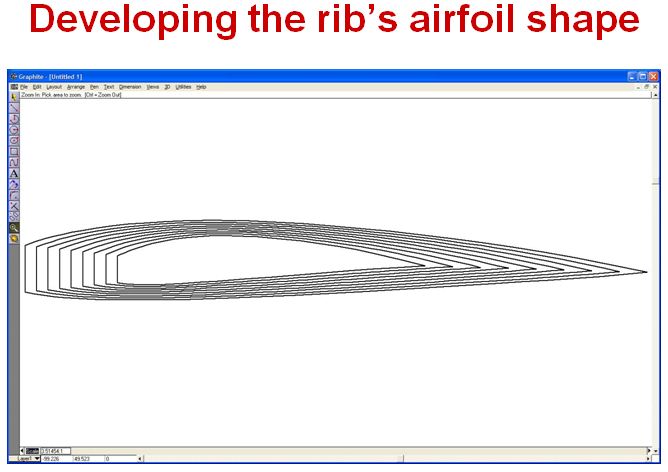
Don't try to draw the ribs freehand. Simply download the airfoils you need and add to your CAD File.
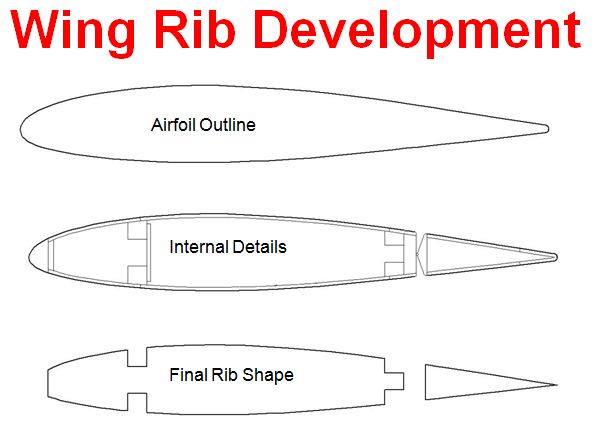
Merely like everything else, you develop the ribs starting from the outside of the basic airfoil shape and working in in steps.
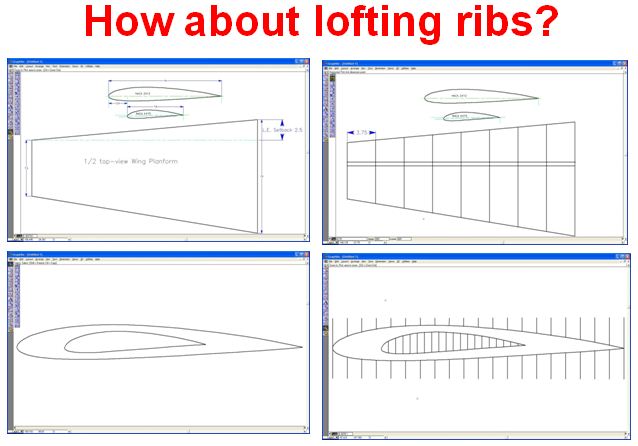
Y'all can also loft ribs if you desire to develop your fly with a progressive airfoil shape that changes from the root to the tip. Start with the wing planform, and the rib placement. Make sure the ribs are spaced evenly. The stack the airfoils and divide into a number of stations.
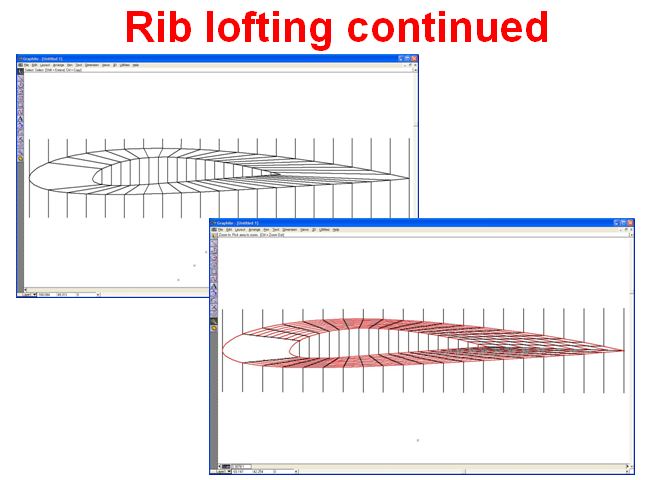
Connect the station lines from the tip to the root rib. Then divide these lines by the number of the ribs you lot want. If y'all want 10 ribs, then split the lines into to 10 equal sections.
Using the spline tool, connect the dots and you develop the individual ribs. Start from the rear end point and work forwards on the rib to the leading edge. Remove the station and projection lines and you take the ribs in a higher place.
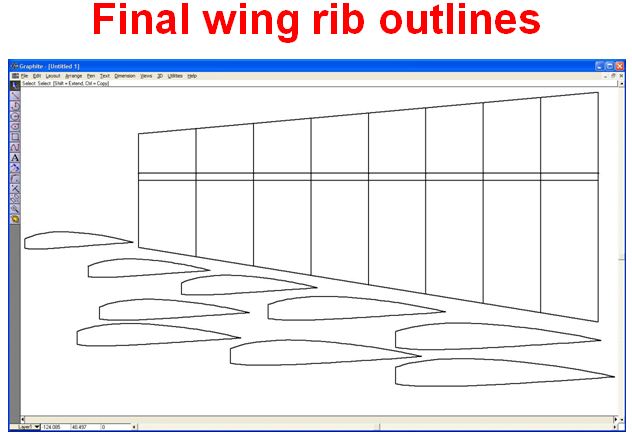
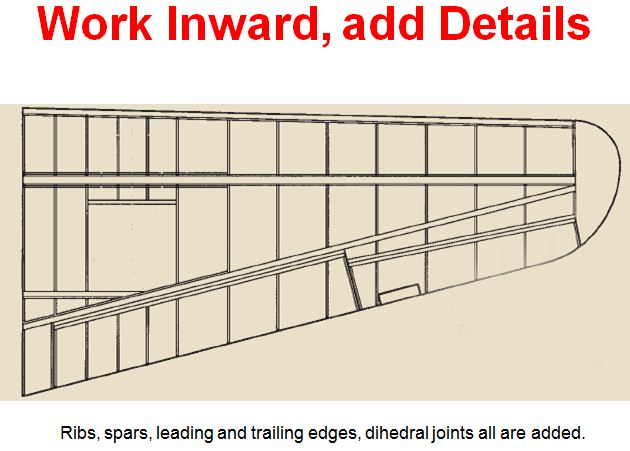
Here'southward the wing planform and the ribs. At present you would piece of work in and add together the notches for the spars and the other details like the wing skin and dihedral braces, abaft edges leading edges, etc. 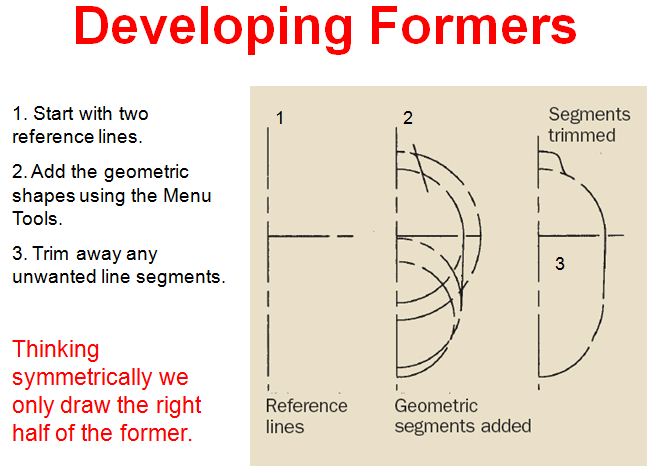
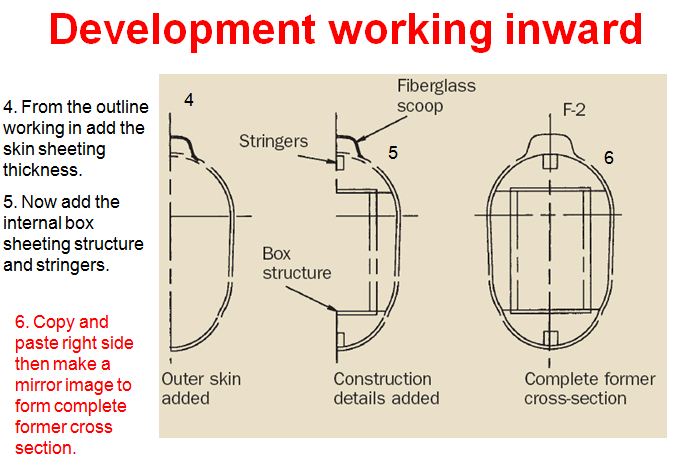
The same basic technique is used to develop fuselage formers.
It'southward a lot of work merely in the stop, you lot take perfectly fitting parts.
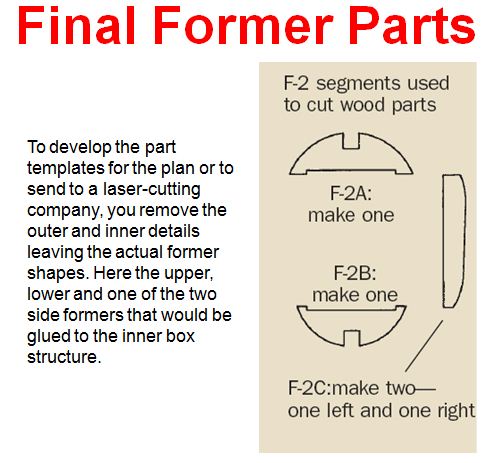
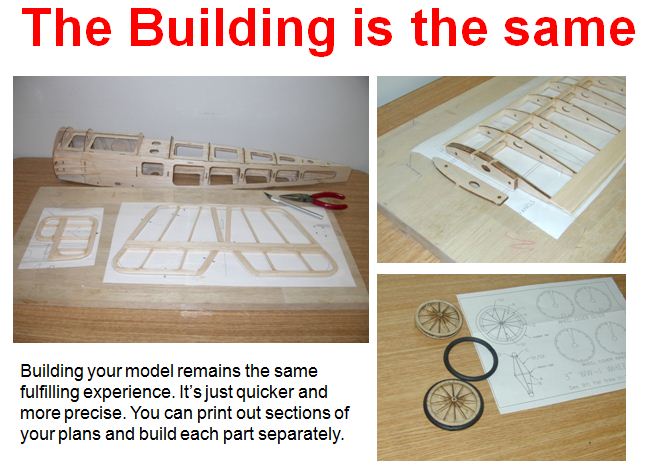
Print the parts out, paste them to your forest and start cut!

Lofting formers is exactly like lofting ribs. The same techniques apply.

So y'all don't want to cutting the parts out yourself? that'southward fine, send the CAD file out and have someone laser cutting the parts out for you.
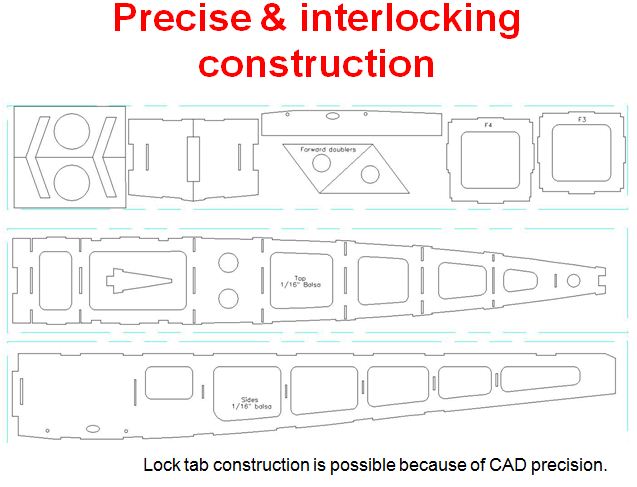
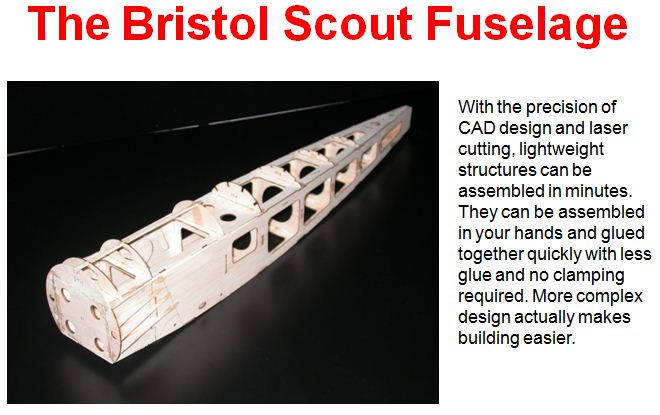
These parts were designed specifically for producing laser cut parts that interlock and form simplified model structures that are strong and lightweight. Often they are self aligning.
Pause out the CA glue and kicker!

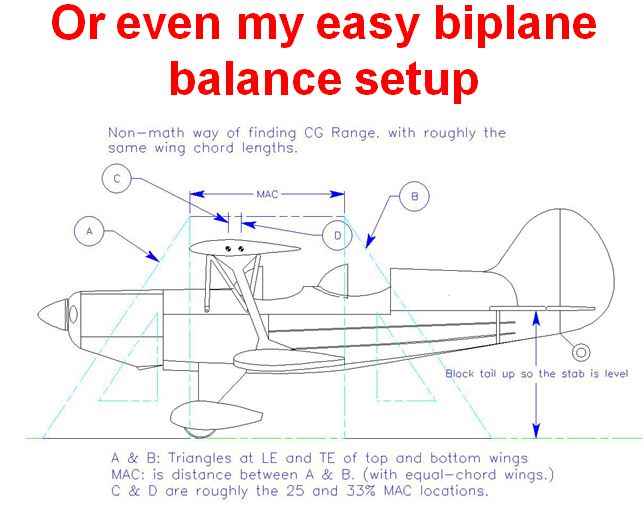
After designing and building your model, you can still utilize your CAD program to do other things similar figureing out where the CG should go.
It's all easy if y'all know what to do. The CAD program helps a lot.
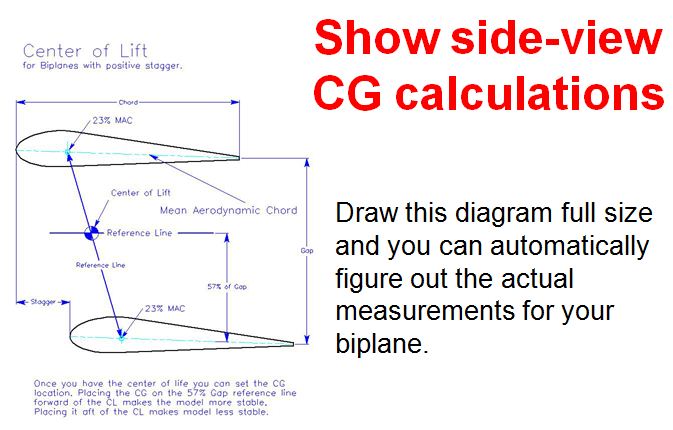
Also, the side view technique for developing the placement of your CG is like shooting fish in a barrel.
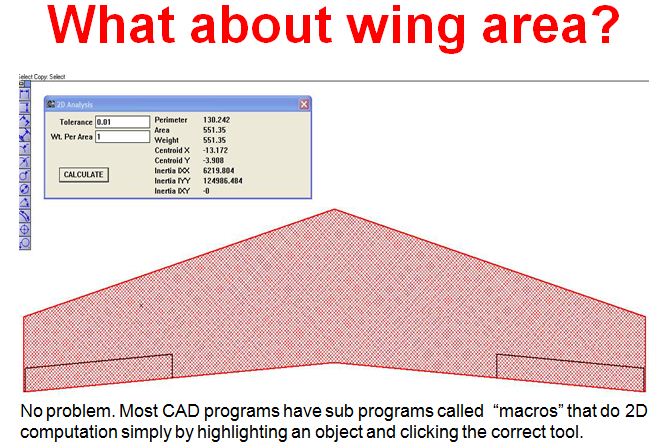
Got the weight of your finished model? Great, with the CAD program you lot can chop-chop find the wing area so you can effigy out what the wing loading will exist.
Source: https://www.modelairplanenews.com/computer-aided-design-and-developing-rc-airplane-plans/
0 Response to "Scale Drawing Rc Plane Cad"
Postar um comentário